Yay, part 2 of the culling/editing/presentation of images series!
In part 1 of the 3 part series, we talked about the most efficient post wedding workflow by using Photo Mechanic. This post picks up where we left off.
So after you’ve done the initial culling and categorizing, it’s onto the dreaded editing. Well, at least for most photographers. I personally enjoy the editing process to see how I really make my images ‘pop’ and give it the Jeremy Chou Photography signature look. So first, you will need to import the files in LR. There are many presets you can apply during the import process. I haven’t found one single preset that works for all the images, so I usually will just apply the meta data as seen here;
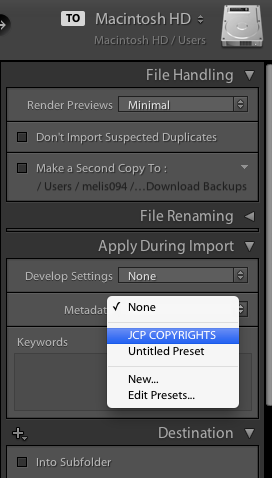
This metadata preset contains my copyrights information and also a link to my website. The cool thing about this is that once you embed the copyrights information, this information will show up automatically on Facebook when you upload! Here’s a another post I wrote on how to embed copyrights information in lightroom. Note that I import at “minimal” Render Previews, not 1 to 1. This will speed up the importing process tremendously.
So remember that little thing Batman said about getting it right in camera? Here’s where that comes in. If you shoot it right in camera, ALL of your exposure should be consistent in a similar lighting condition. I also shoot with Custom White Balance so all of my white balance is the same in the same lighting condition. This will speed up your editing time 10 folds. 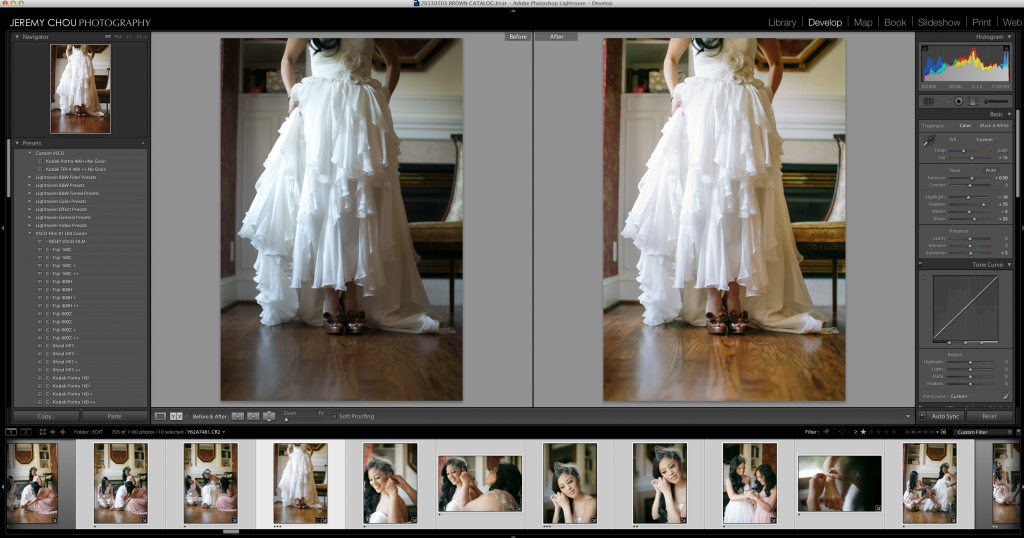
The above strip of images is from Aileen & Doug’s gorgeous destination wedding at Hans Fahden Winery in Calistoga. Aileen got ready in a cozy bed & breakfast, and the window light was just to die for. I had the bride & all of her bridesmaids stand in the little of the room where the natural light was consistent. I turned off all the other light source so I don’t mix different color temperatures (tungsten & daylight mixing makes a great B&W photo…). I selected the above image as my base image for editing, because it has the right color I want, and also I can see her dress still retained all the highlights. This image will cover about 90% of the other images taken in the same area. Once I edit the photos to be exactly what I want, I select the rest of the images and hit “Auto Sync/Sync” on the bottom right of the screen. And this is what pops up;
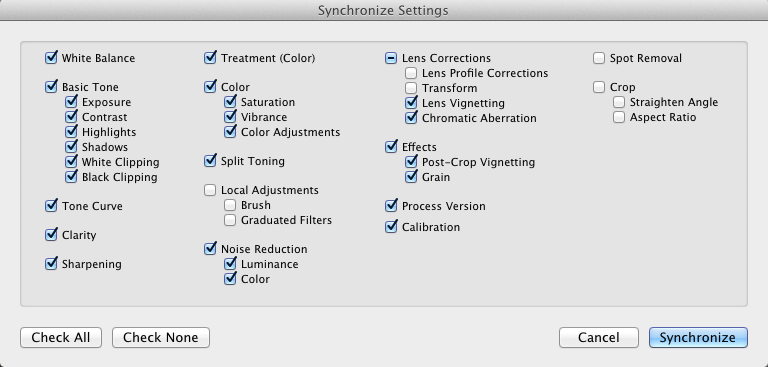
I pretty much sync up all the settings except spot removal, crop, and local adjustments. Once you hit ‘Synchronize” all the images will receive the same treatment. Again, this is where learning how to shoot straight out of camera is so important. Without shooting consistently, you will literally have to go in and edit every.single.image.. This could take valuable time away from family or working on your business. I still look at every single photo before it goes out, but I don’t have to ‘edit’ every single photo. Hopefully that makes sense.
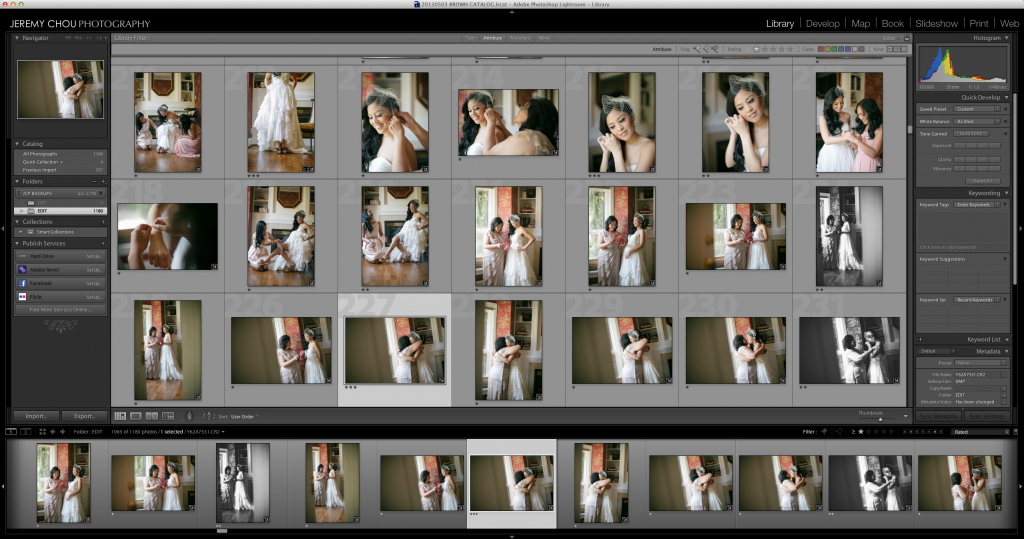
Keep in mind that all the star rating I assigned in Photo Mechanic will still show up here in Lightroom. So very quickly I can identify what I’m keeping, what I’m blogging, etc.. I will usually edit all the 2 Stars (blogging) images first. I am very careful in selecting what I blog. I generally will blog one image in every lighting condition. This will tell the whole story of the day,but it will also help me to sync up my settings later on when I am editing through the whole wedding.
Once I am done with all the editing, it’s time to export!
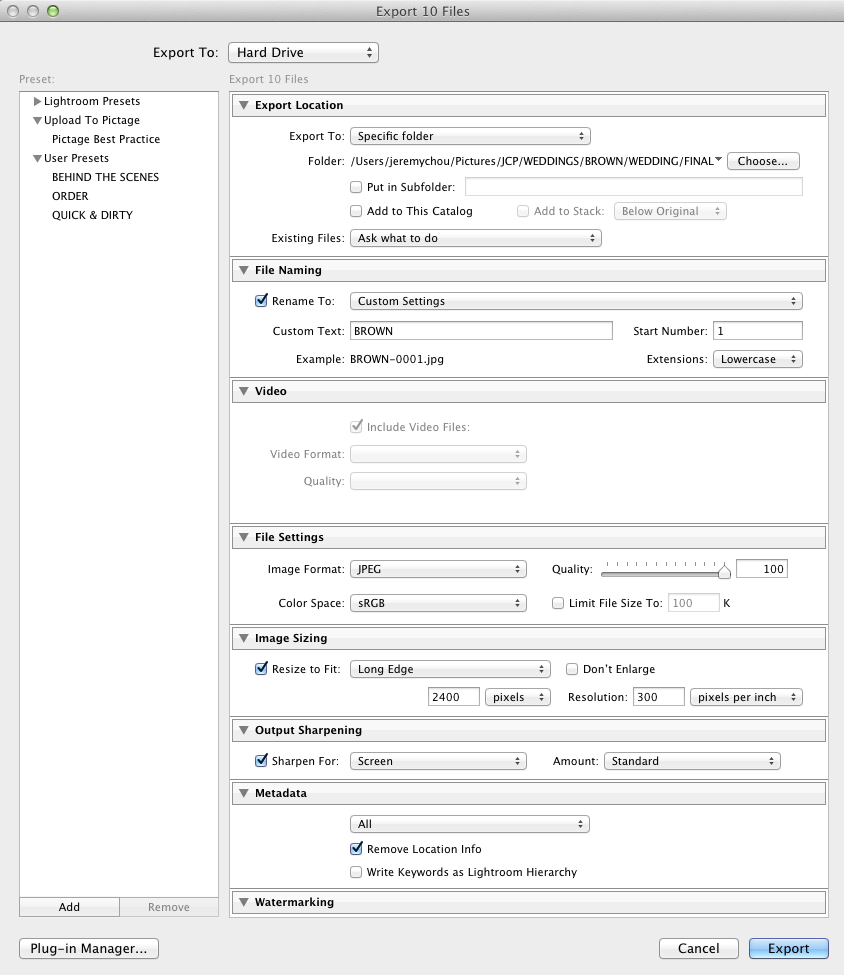
Here’s my preset for weddings. Another way that you can speed up your exporting time is to avoid exporting at full size. Yes yes, contrary to popular belief, you do NOT have to export at full size. Check out this helpful post from Smugmug about the recommended sizes. At this point, this process would have taken me about 4 days after the wedding, pretty efficient, huh?
Next week, I’ll be sharing about how I prepare my images and categories I use so it works seamlessly with my online gallery, Pictage. Make sure you come back and check it out!
Share this story